No products in the cart.
Tips
How to Print a T-Shirt Yourself Cheap & Easy at Home with IRON

29
Apr
Apr
You want to make a special shirt yourself. I will guide you right here. It’s a simple, easy way to print yourself a t-shirt at home by iron to do, but the quality won’t be as good as professionally printed t-shirts
Step 1: Prepare
You need to prepare the necessary things below to be able to follow my instructions.
- IRON
- Cotton T-Shirt (Black or White)
- Color Printing
- A4 Paper
- Cling Wrap/Food Wrap
- Butter Paper
- Scissors
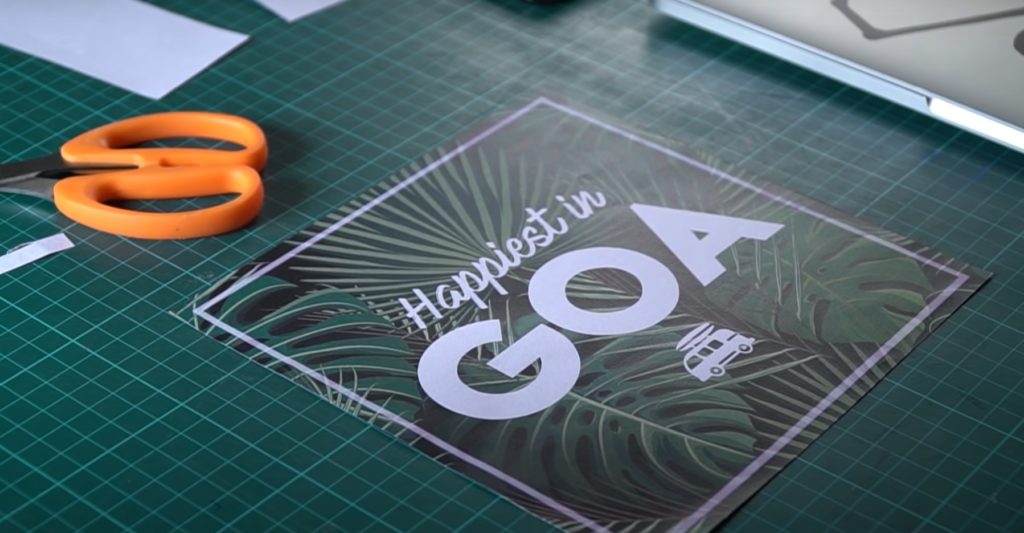
Step 2: Create the file art
If you have any idea and want it printed on your t-shirt, you can use Photoshop or Illustrator to create the file art. Or you love so much a picture that you see on the internet and want it on your shirt. Just download it and do these steps at home to get your handmade t-shirt.
- You must adjust the file design to square, the goal is to get your design printed to fit onto the shirt.
- And the size of the file must be from 2400px for a better print.
Tips: If you don’t know how to turn your idea into the file art, let contact Banantees do it.
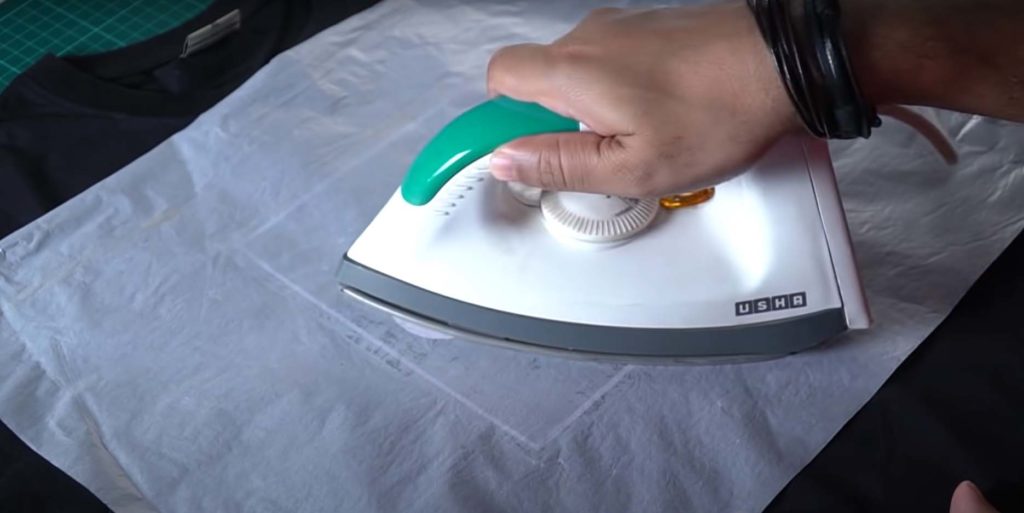
Step 3: Make the printing pallet
You use food wrap to carefully wrap the print.
- On the colored side of the paper, you wrap it once and make sure it’s not wrinkled, the side must be flat.
- And on the backside, you wrap more layers of food wrap. The reason is that soon we will use an iron with a high temperature so that the plastic layer can stick to the shirt.

Backside:

Step 4: Print on the shirt
- You turn on the iron to heat up, spread your shirt on a flat surface then place the print on the surface, the side with the print facing up, making sure not to wrinkle.
- Then you use the butter paper on the front of the print and the iron to warm up the print. The purpose is for the A4 paper and the cling film to stick together, and so that the paint can stick to the shirt because the food wrap on the back layer melts and sticks to the shirt.
And this is the result.